The Brand New Box Rails Book
Getting started with Rails for the benefit of everyone
Step 4 — Creating the Application Root View and Testing Functionality
Ideally, you want the landing page of your application to map to the application’s root, so users can immediately get a sense of the application’s purpose.
There are a number of ways you could handle this: for example, you could create a Welcome controller and an associated index view, which would give users a generic landing page that could also link out to different parts of the application. In our case, however, having users land on our books index view will be enough of an introduction to the application’s purpose for now.
To set this up, you will need to modify the routing settings in config/routes.rb to specify the root of the application.
Open the file for editing using VSCode.
The file will look like this:
config/routes.rbRails.application.routes.draw do
resources :books
# For details on the DSL available within this file, see https://guides.rubyonrails.org/routing.html
end
Without setting something more specific, the default view at http://localhost:3000 will be the default Rails welcome page.
In order to map the root view of the application to the view of the books controller, you will need to add the following line to the file:
config/routes.rbRails.application.routes.draw do
resources :books
root 'books#index'
# For details on the DSL available within this file, see https://guides.rubyonrails.org/routing.html
end
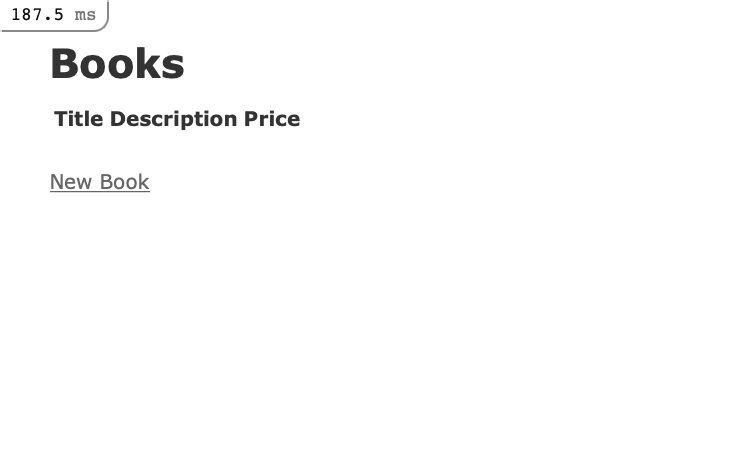
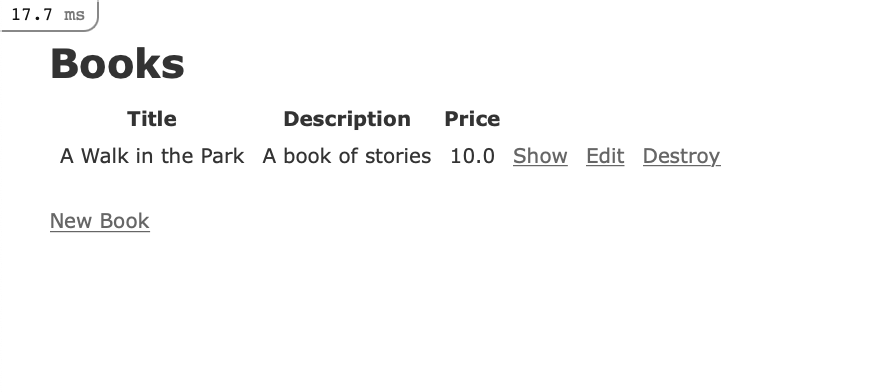
Now, when users navigate to your application root, they will see a full listing of books, and have the opportunity to create a new book entry, look at existing entries, and edit or delete given entries.
Navigate to http://localhost:3000, instead of seeing the “Hello World” page, you should see a list of books.
Your application landing page will look like this:
To create a new book, click on the New Book link at the bottom of the page, which will take you to the book/new route:
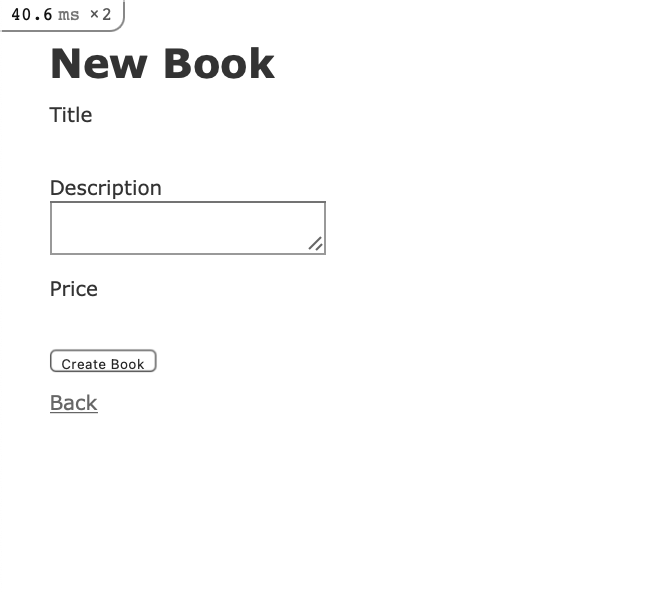
Let’s add some demo information to test our application. Input “A Walk in The Park” into the Title field, “A book of stories” into the Description field, and 10 as a Price.
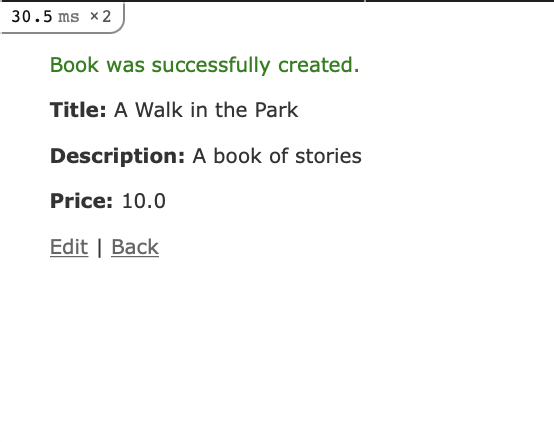
Click on the Create button to create the book.
This will direct you to the show route, which, thanks to the before_action filter, is set with the set_book method, which grabs the id of the book we’ve just created:
app/controllers/books_controller.rbclass BooksController < ApplicationController
before_action :set_book, only: %i[ show edit update destroy ]
...
# GET /books/1 or /books/1.json
def show
end
...
private
# Use callbacks to share common setup or constraints between actions.
def set_book
@book = Book.find(params[:id])
end
You can test the edit function now by clicking Edit on your book entry. This will take you to the edit route for that book:
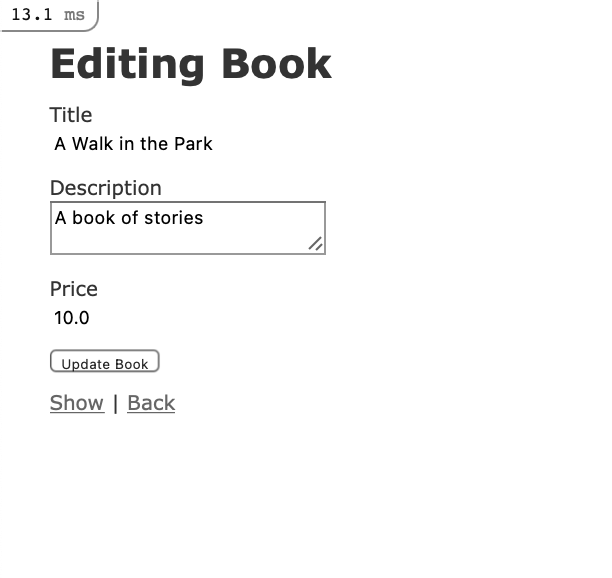 Change the description for A Walk in The Park to read “A summer day” instead and click Update Book. This will take you back to the
 show route:
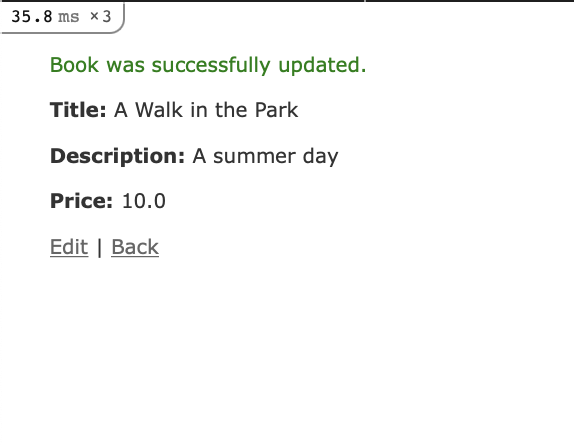 Finally, clicking Back will take you to your updated
 index view:
Now that you have tested your application’s basic functionality, you can add some validations and security checks to make everything more secure.
Step 5 — Adding Validations
Your book application can accept input from users, but imagine a case where a user attempts to create a book without adding a title to it, or creates an entry for a book that’s already in the database. You can create mechanisms to check data before it gets entered into the database by adding validations to your models. Since your application’s logic is located in its models, validating data input here makes more sense than doing so elsewhere in the application. Rails provides lots of great validation options for us to use.
Note that we will not cover writing validation tests in this tutorial, but you can find out more about testing by consulting the Rails documentation.
Navigate to, and open your book.rb model file:
Currently, the file tells us that the Book class inherits from ApplicationRecord, which in turn inherits from ActiveRecord::Base:
app/models/book.rbclass Book < ApplicationRecord
end
Let’s first add some validations to our title field to confirm that the field is filled out and that the entry is unique, preventing duplicate entries:
app/models/book.rbclass Book < ApplicationRecord
validates :title, presence: true, uniqueness: true
end
Next, add a validation for the description and price field to ensure that they, too, are filled out:
app/models/book.rbclass Book < ApplicationRecord
validates :title, presence: true, uniqueness: true
validates :description, presence: true
validates :price, presence: true
end
We are less concerned here with the uniqueness of the description, as long as they are associated with unique book entries.
Save the file when you are finished.
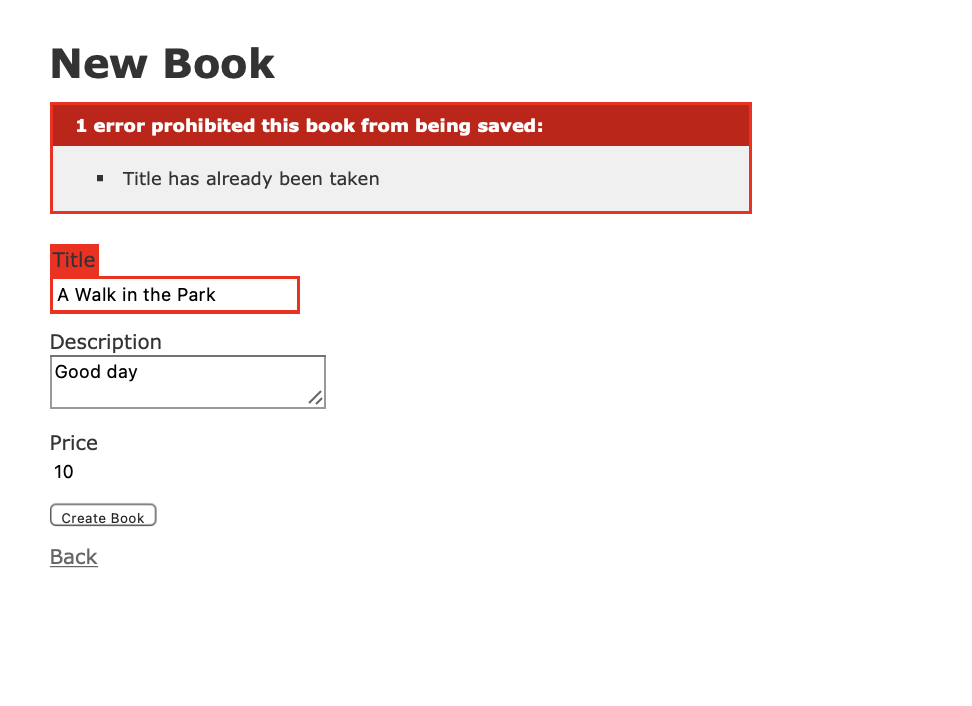
Click on New Book. In the form, add “A Walk in The Park” to the Title field, “Good day” to the Description field, and 10 to the Price field. Then click on Create Book. You should see the following warning:
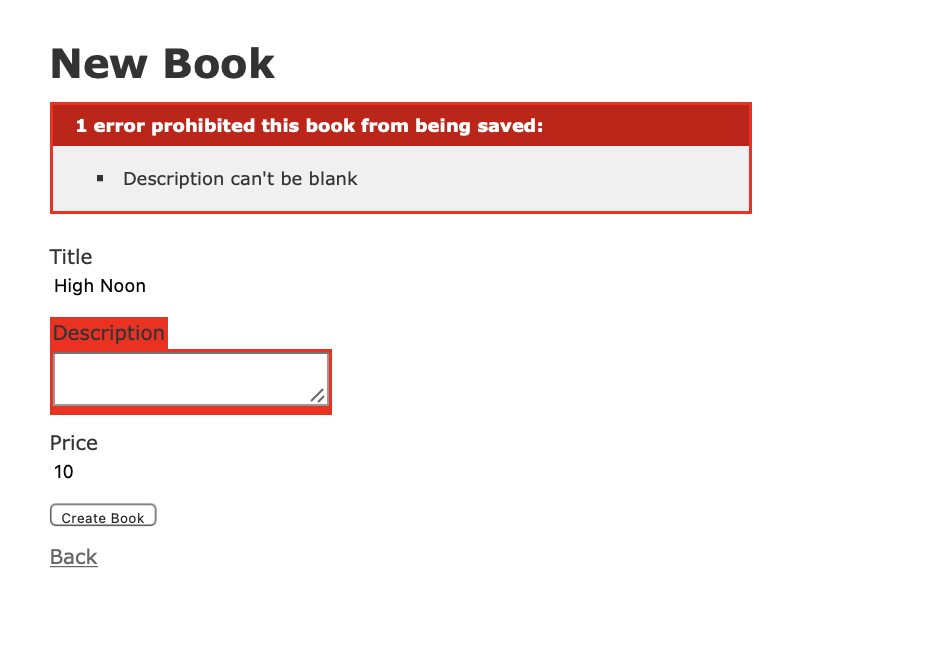
 Now, let’s see if we can check our other validation. Click Back to return to the homepage, and then New Book once again. In the new form, enter “High Noon” in the Title field, 10 to the Price field, and leave Description field blank. Clicking Create Book will trigger the following warning:
 With these changes, your application has some validations in place to ensure consistency in the data that’s saved to the database. Now you can turn your attention to your application’s users and defining who can modify application data.
Step 6 — Adding Authentication
With validations in place, we have some guarantees about the data that’s being saved to the database. But what about users? If we don’t want any and all users adding to the database, then we should add some authentication measures to ensure that only permitted users can add books. In order to do this, we’ll use the http_basic_authenticate_with method, which will allow us to create a username and password combination to authenticate users.
There are a number of ways to authenticate users with Rails, including working with the bcrypt or (our standard) devise gems. For now, however, we will add a method to our application controller that will apply to actions across our application. This will be useful if we add more controllers to the application in the future.
Open the file that defines your ApplicationController, application_controller.rb
Inside, you will see the definition for the ApplicationController class, which the other controllers in your application inherit from:
app/controllers/application_controller.rbclass ApplicationController < ActionController::Base
end
To authenticate users, we’ll use a hardcoded username and password with the http_basic_authenticate_with method. Add the following code to the file:
app/controllers/application_controller.rbclass ApplicationController < ActionController::Base
http_basic_authenticate_with name: 'sammy', password: 'wammy', except: [:index, :show]
end
In addition to supplying the username and password here, we’ve also restricted authentication by specifying the routes where it should not be required: index and show . Another way of accomplishing this would have been to write only: [:create, :update, :destroy]. This way, all users will be able to look at all of the books and read descriptions of the books. When it comes to modifying site content, however, users will need to prove that they have access.
In a more robust setup, you would not want to hardcode values in this way, but for the purposes of demonstration, this will allow you to see how you can include authentication for your application’s routes. It also lets you see how Rails stores session data by default in cookies: once you authenticate on a specified action, you will not be required to authenticate again in the same session.
Save app/controllers/application_controller.rb when you are finished editing. You can now test authentication in action.
On the landing page, click on the New Book button. This will trigger the following authentication window:
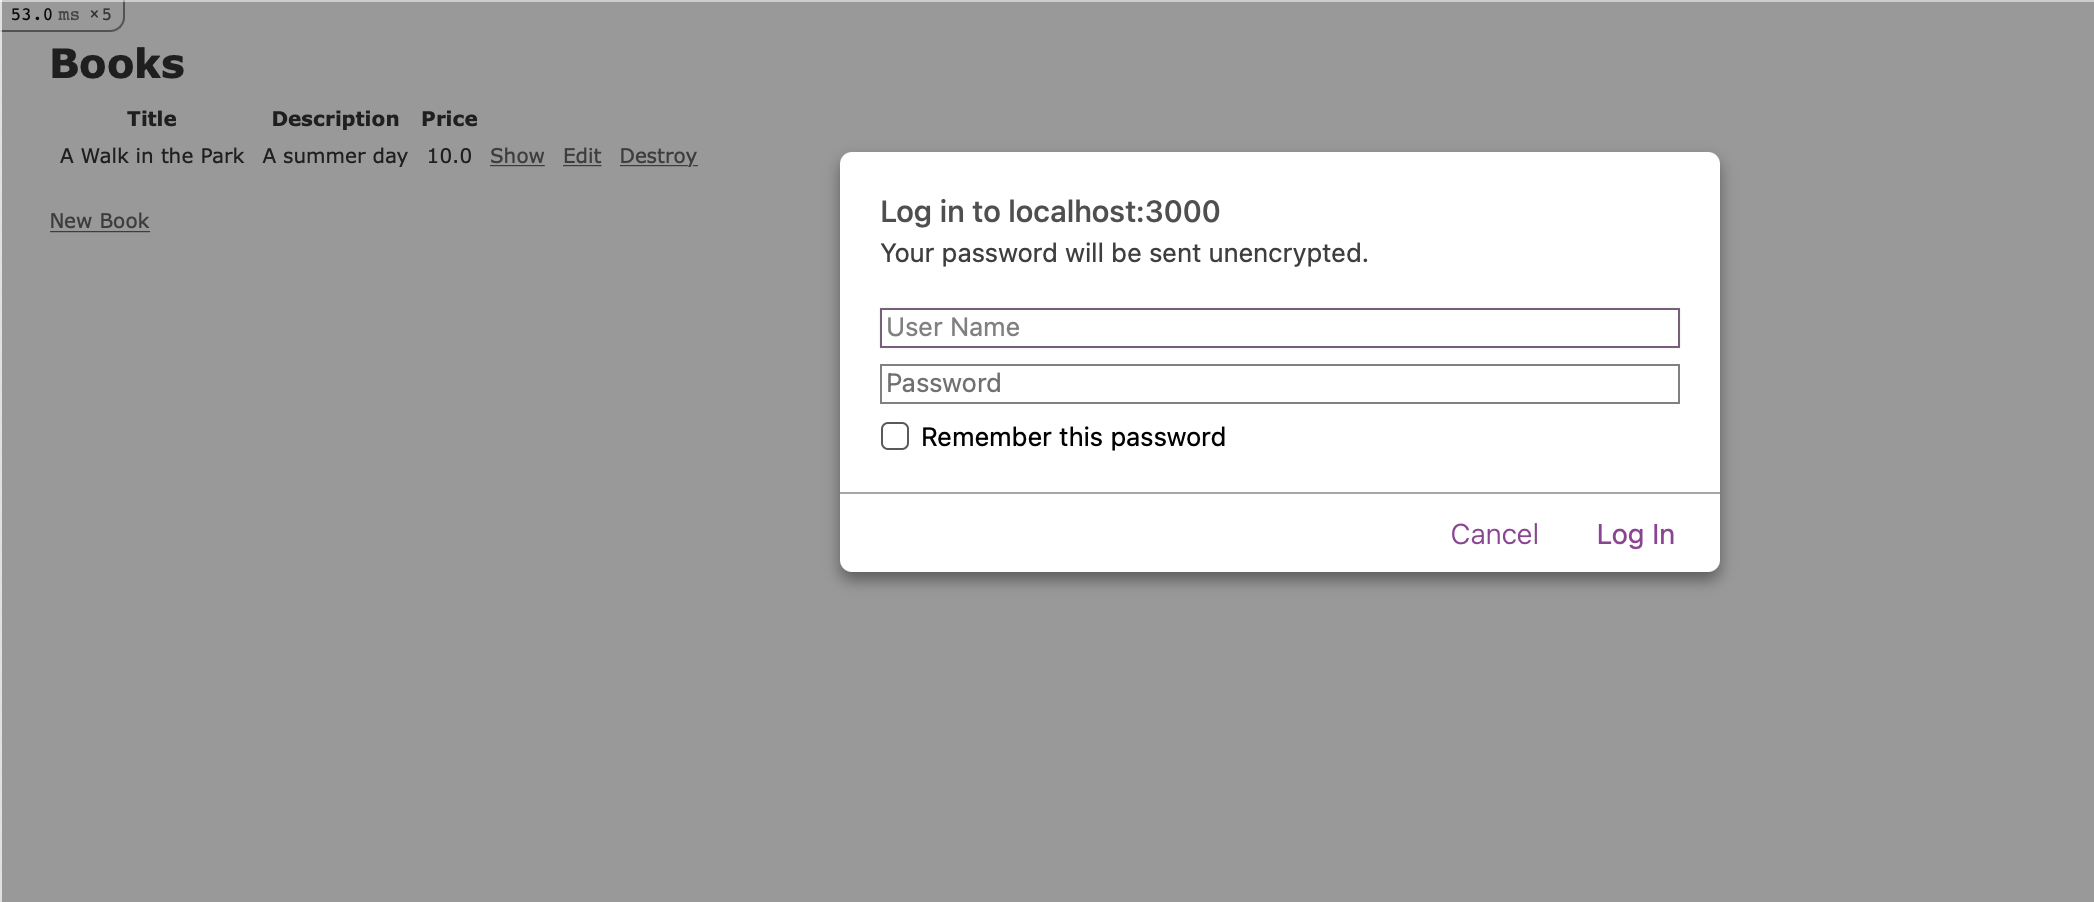
If you enter the username and password combination you added to app/controllers/application_controller.rb, you will be able to securely create a new book.
You now have a working book application, complete with data validations and a basic authentication scheme!